
|
WPF Localization and Internationalization |
Windows Presentation Foundation (Wikipedia) is the framework to build GUI applications in .NET. The other framework, the classic one, is Windows Forms. WPF uses .xaml and .resx files as a resource data. Soluling supports all WPF applications no matter if they use .NET Framework (Wikipedia) or .NET (Wikipedia). Soluling localization tool and service support all WPF applications from .NET Framework 3.0 to the newest version of .NET, including .NET 10.
The following chapters describe the WPF localization step by step.
The end of the document contains links to get the full source code of the samples. After reading this document, we recommend reading a tutorial about how to use Soluling.
You can localize WPF applications using the following methods:
The first way to localize a .NET project is to add a Visual Studio project file (.csproj, .vbproj, .fsproj, or .vcxproj) into a Soluling project. Soluling reads the project file to locate all the resource files it uses (.resx, .xaml, images, etc.). You don't have to manually select all the resource files, but adding one single project file is enough. There is one output file, the satellite assembly (.resources.dll), for each language.
If you have multiple project files, you can add a Visual Studio solution file (.sln) instead of individual project files. Suppose you later add new projects to your solution. In that case, you don't have to add anything to your Soluling project because Soluling will automatically find the latest items from the solution file and adds them to the project. The result you will get by using a Visual Studio solution file instead of individual project files is the same. Your Soluling project will contain the same sources, you can configure them in the same way, and the output files will be the same. Support for the Visual Studio solution file is to make things easier for you.
This is the recommened way to localize all .NET projects.
Another way to localize a .NET project is to add an assembly file into a Soluling project. Soluling reads the assembly to locate all the resource data it uses. When building, Soluling creates satellite assembly files. There is one output file, the satellite assembly (.resources.dll), for each language. You don't need to have the source code files. The only file you need is the original assembly file.
In addition to creating satellite assembly files, Soluling can also create localized assembly files. The difference is that the localized assembly file is an identical copy of the original assembly. It contains the same code segments as the original. You can replace the original assembly with localized assembly without breaking anything. You deploy the localized assembly file without the original assembly file. The satellite assembly files, on the other hand, contain only resources. They do not contain any code. They do not run alone but must always be deployed with the original assembly file. By default, Soluling creates satellite assembly files. You can change this by using the Output sheet of Source dialog.
The primary UI resource of a WPF application is XAML. Visual Studio creates the original XAML files that are XML based text files. When an assembly is compiled, the compiler converts XML based XAML files into binary BAML files that are stored into assembly files as resources similar to compiled .resx files. Unfortunately, the conversion from XAML to BAML is a one-way operation. BAML file can not be fully converted back to the original XAML. However, BAML files can be localized but with limitations: not all properties can be localized, and each element must have an x:Uid attribute (not Uid).
It is recommended to manually add x:Uid attributes to give a meaningful value for the attribute (the attribute value is used as a context value). However, if you want to use a more automated approach, you can use the following command.
MsBuild.exe /t:updateuid MyProject.csproj
MsBuild.exe tool can be found from .NET framework directory (e.g. C:\Windows\Microsoft.NET\Framework\v4.0.30319\MsBuild.exe) or in the SDK directory (e.g., C:\Program Files (x86)\Microsoft Visual Studio\2019\Preview\MsBuild\Current\Bin).
The last localization method is to localize each XAML file (.xaml) and resource file (.resx). Soluling reads the original resource file and, when building, creates localized resource files. There is one output file for each language. Although this method seems easy, it has two drawbacks. First, you can not use localized resource files directly, but you have to put them inside an assembly file. If you use resource file localization, it is up to you to compile either the localized assembly file(s) or localized satellite assembly file(s). Second, a typical .NET project contains dozens of resource files, and in many cases, they are scattered around several folders. You have to add them all to your Soluling project. Even using wildcards, the process may be complicated. Also, every time you add a new resource file, you may require to add it to the project.
Internationalization is a process where you enable your application for localization.
The most important part is to remove hard coded strings. .NET has a built-in feature resource string. Let's have an example. The following line contains a hard coded string.
private void Form1_Load(object sender, EventArgs e)
{
  label1.Text = "Hello World"
}
First, we need to add the string to the resource file. Add Resources.resx file to your project. Then double click the file and press + button.
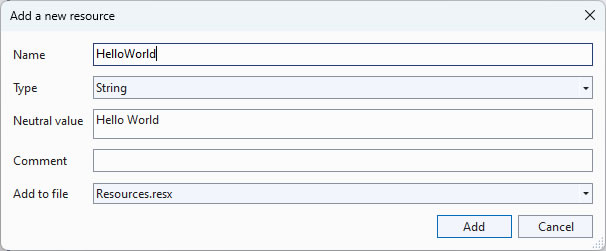
If you use an older Visual Studio or you prefer the legacy resource editor, you will see a resource string grid where you can add the string.

Try to give a meaningful name for the resource string name. By default, the translator can only see the string name and the value. So HelloWorld is a better name than String1. If you want to pass more information to the translator, you can add comments to resource strings.
private void Form1_Load(object sender, EventArgs e)
{
  label1.Text = Resources.HelloWorld;
}
That is all. You just resourced a hard coded string.
Note! Soluling needs the compiled assemblies during the build process. Before starting localization, make sure you have built your Visual Studio project. If not, start Visual Studio and choose Build | Build Solution menu to build.
Start by creating a new Soluling project. Drag and drop a Visual Studio project file (.csproj, .vbproj, .fsproj, or .vcxproj), a Visual Studio solution file (.sln), or a .NET assembly file (.exe or .dll) to Soluling. Project Wizard appears, showing first the Resources page. If you use .NET Core or .NET 5 or later and use the binary localization, the main assembly is a .dll file. The .exe file with the same name is an unmanaged wrapper app that needs no localization.
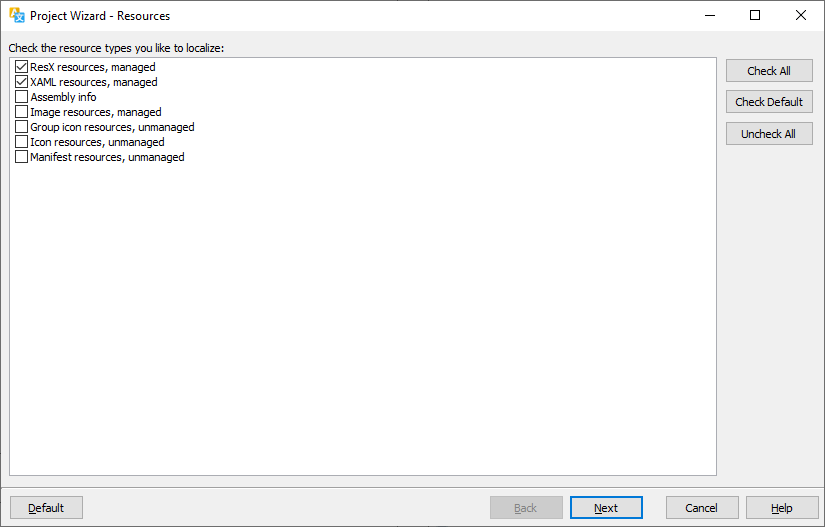
Select the resource types you want to localize. In most cases, the default types (ResX and XAML) are all you need to localize. Click Next. If you have previously localized your application, you might have localized .resx and .xaml files. In this case, Soluling finds the existing localized file. If at least one file is found, Project Wizard shows the following page.
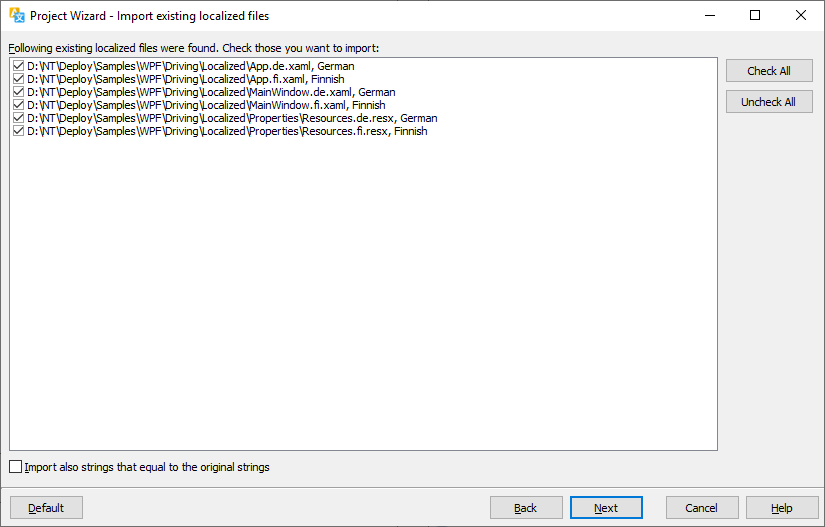
Click Next. The Languages page appears. If no existing languages were found, the language list is initially empty. If existing languages were found, the list contains them. In either case, you can add any number of target languages.
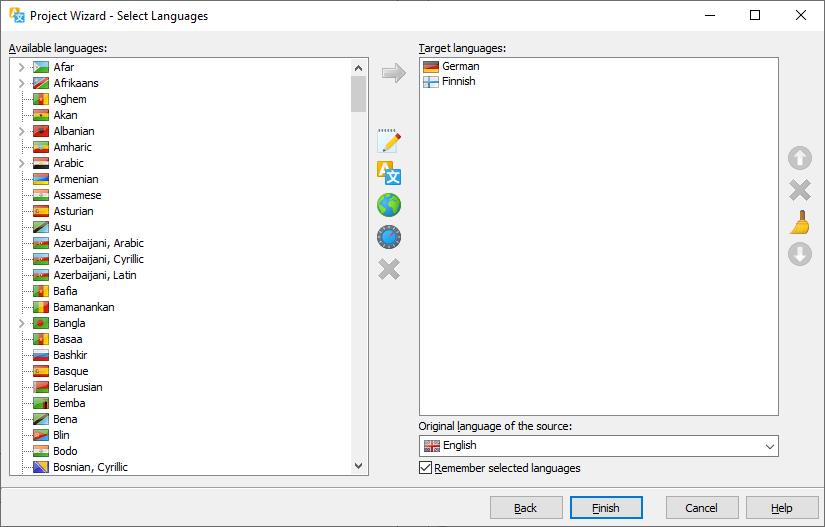
Finally, click Finish to complete Project Wizard. Your new Soluling project is ready.
If you added a Visual Studio project or solution to your Soluling project, you will need to have a Visual Studio installed. Even if you use Soluling's command-line tool (SoluMake.exe) on your build process, that machine needs to have Visual Studio, or Build Tools for Visual Studio installed. This is because Soluling uses MsBuild.exe tool to when compiling localized XAML files.
If you use your own build server, or a self hosted DevOps machine, install either Visual Studio or Build Tools for Visual Studio. If you use cloud based host agents, make sure it has at least Build Tools for Visual Studio.
Sometimes, the standard MsBuild.exe included to the .NET runtime will work. However, with most projects, you will need a MsBuild from VS. If there are multiple MsBuild.exe tools installed, Soluling will automatically select the most appropriate.
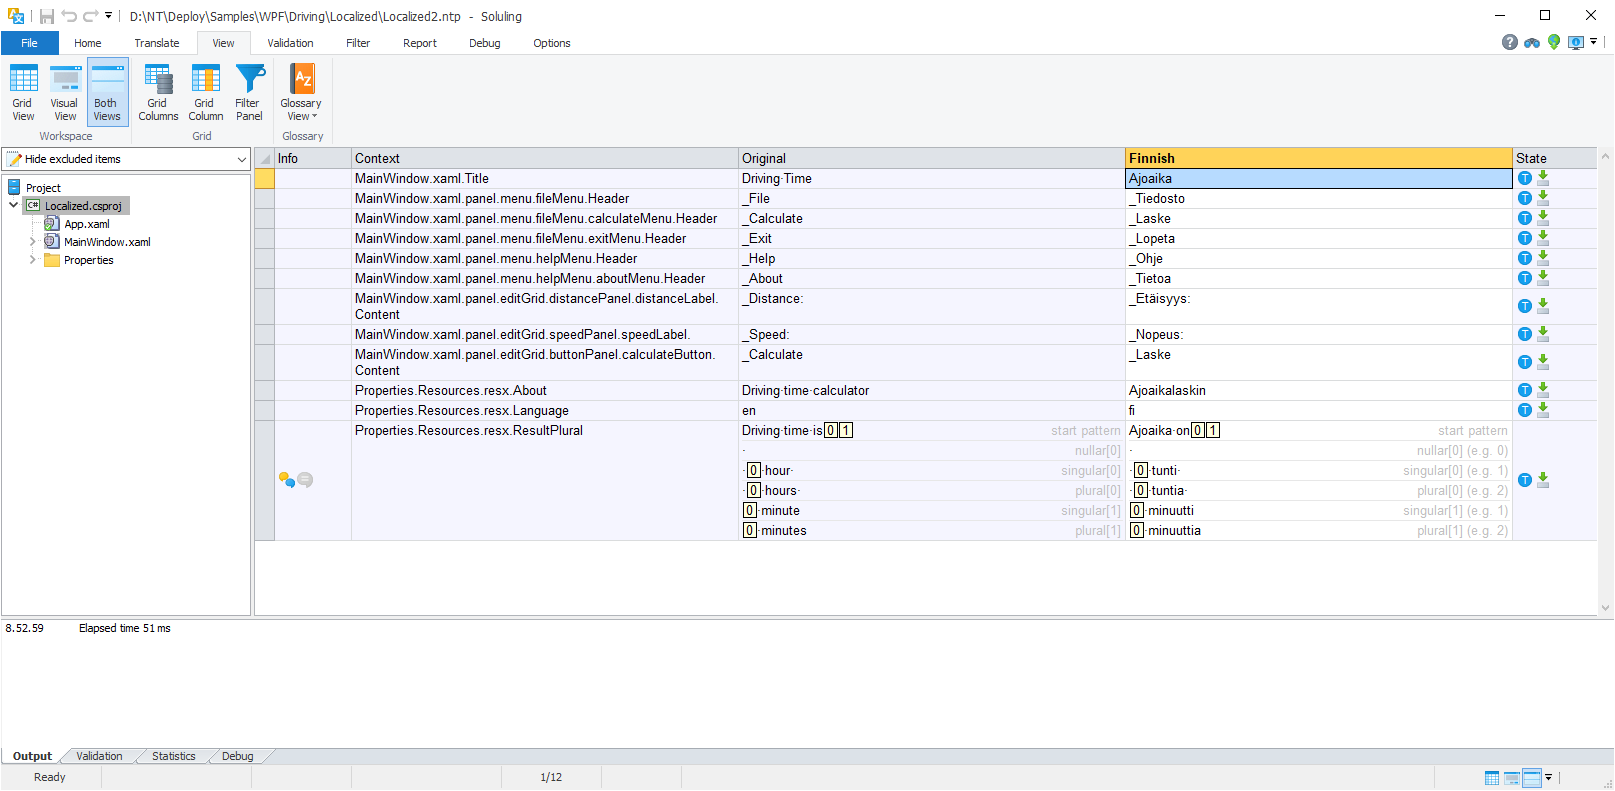
When Soluling scans XAML data, it composes a context for each element. This context is important because it is used to identify each string. The context is formed by combining the property name with the element name. The property name is straightforward because it is the name of the attribute holding the property or Content if the value comes from the element value instead of the attribute value. However, the element name is more complex. By default, XAML elements do not have any id or name. For example
<Label>This is a sample</Label>
The above sample does not have any attributes that would give a name. This is why Soluling uses a combination of the element name and index. In this case, Label[0]. If the relative position of the Label in its parent changes (e.g., from the first label to the second label), so does the context ("Label[0]" -> "Label[1]"). We want to avoid this. By adding a name/id attribute, we can give a specific name of the element.
<Label x:Uid="sampleLabel">This is a sample</Label>
x:Uid is the recommended way to specify the name. However, you can also use Uid, x:Name, Name, x:Key or AutomationProperties.AutomationId. However, if you plan to use assembly file localization, you must use x:Uid. If the element does not contain x:Uid its properties cannot be localized when using assembly file localization. If you use Visual Studio project or solution file localization, then you can use other id attributes too.
If you want to access the element from the code, you have to add either Name or x:Name attribute.
<Label x:Name="sampleLabel">This is a sample</Label>
The above Label does not have x:Uid. This is fine if you use Visual Studio project or solution file localization, but if you use assembly file localization, you must also add x:Uid attribute.
<Label x:Uid="sampleLabel" x:Name="sampleLabel">This is a sample</Label>
This is a bit verbose but required if assembly file localization is used. The values of x:Uid and x:Name do not need to be the same.
It is recommended to manually add x:Uid attributes to give a meaningful value for the attribute (the attribute value is used as a context value). However, if you want to use a more automated approach, you can use the following command.
MsBuild.exe /t:updateuid MyProject.csproj
MsBuild.exe tool can be found from .NET framework directory (e.g. C:\Windows\Microsoft.NET\Framework\v4.0.30319\MsBuild.exe) or in the SDK directory (e.g., C:\Program Files (x86)\Microsoft Visual Studio\2019\Preview\MsBuild\Current\Bin).
Soluling uses scan rules to specify what components and properties are localized and how they are localized. XAML resources are the most important resource type of WPF applications. The default rules handle the default WPF controls. If you use 3rd party or your own controls, you might need to add some extra rules.
The data binding's StringFormat does not use the CultureInfo.CurrentCulture property. Instead, it relies on the Language property of the XAML element. So if you use StringFormat with data binding make sure you turn on Language property adding. When that is on, Soluling adds the Language property to the root of every localized XAML file.
See samples in <data-dir>\Samples\WPF\Biding to see how to locale data biding.
The visual editor for WPF is a preview editor. The editor only shows the localized windows or page but does not let you modify it. It can only show windows and pages that use the standard WPF controls. If you have any 3rd party or custom controls, the preview can not show them.
Note! To enable the editor or preview, you need to have a .NET 4.x runtime installed. Windows 10 and later have pre-installed .NET Framework (4.0-4.8.1).
Soluling extends the .NET framework by providing classes to perform a runtime language change. It is possible to start an application in one language and later change the language on run time as many times as needed. Soluling's runtime language change is speedy and flicker-free.
Soluling.WPF namespace contains classes and functions that let you change the language of a .NET application on run time. <data-dir>\Library\NET\Translator\WPF contains the source code of the C# library project that contains the classes. If you compile this project, you will have Soluling.Translator.Wpf.dll library assembly file. It contains all the classes.
You can get the Soluling API as a NuGet package.
PM> Install-Package Soluling
Adding the above package to your project adds several Soluling assembly references to your project. You can remove references that you don't need.
| Reference | Description |
|---|---|
| Soluling | Soluling library. Keep this always. |
| Soluling.Translator.Forms | Windows Forms translator. Keep this if you use Windows Forms. |
| Soluling.Translator.WPF | WPF translator. Keep this if you use WPF. |
Instead of the NuGet package, you can add the following to projects into your solution:
| Project | Description |
|---|---|
| <data-dir>\Library\NET\Standard\Soluling.csproj | Soluling library. Add this always. |
| <data-dir>\Library\NET\Translator\Forms\SolulingTranslatorForms.csproj | Windows Forms translator. Add this if you use Windows Forms. |
| <data-dir>\Library\NET\Translator\Forms\SolulingTranslatorForms.csproj | WPF translator. Add this if you use WPF. |
Then in your main project, add references to the above projects.
You can read the API documentation from <data-dir>\Library\NET\NET.chm file. The API source code is in GitHub.
Soluling.WPF.Translator is a class that translates WPF windows, pages, and controls. Soluling.Resources is a class that works with satellite assembly files. Finally Soluling.WPF.SelectLanguage contains a dialog that shows s available languages and lets the user select a new language.
Adding runtime language change is very easy. At a minimum, it only requires that you add one line of code into your application.
private void languageButton_Click(object sender, RoutedEventArgs e)
{
  SelectLanguage.Select(DisplaLanugage);
}
It is simple like that!
Note! You need to make sure that all your components have an id property if you plan to use the runtime language switch.
WPF translating requires more explanation. Soluling.SelectLanguage.Select calls Soluling.WPF.Translator.SetUserInterfaceLanguage function that performs resource loading and calls Soluling.WPF.Translator.Translate function that translates existing forms. It is very important to understand what happens here. Soluling reads the localized XAML data from a satellite assembly file. This means that all the components and properties of the window that exist in the localized XAML data will be reassigned. However, if you changed any property value from code, for example, in Load or Show events, the property values do not change. If these so-called dynamic property values need to be localized, you have to set them again after language change. Let's have an example.
<data-dir>\Samples\WPF\LanguageSwitch contains a simple application using runtime language change. Window_Loaded calls UpdateItems method that sets the initial value of the label2.Content.
private void Window_Loaded(object sender, RoutedEventArgs e)
{
  UpdateItems();
}

private void UpdateItems()
{
  label2.Content = Properties.Resources.String1;
}
When the application has loaded, the window is not the same as in design time. The design time state is the state that exists in the .xaml file. The Content property of the label2 control has been changed on run time. When a language change occurs, Soluling automatically updates the static properties (e.g., those on the XAML data) but does not alter these dynamic properties (or actually alters them to the design state). This is why you have to do the runtime setting again. The following code changes the language and translates dynamic properties.
private void languageButton_Click(object sender, RoutedEventArgs e))
{
  if (SelectLanguage.Select())
    UpdateItems();
}
SelectLanguage.Select changes the language, and UpdateItems resets the dynamic properties using the new language.
Now our application works. It might seem a bit complicated that you have to remember to reset any dynamic properties after a language change. However, in most cases, your language change routine is on the main menu or the main window. In a situation like that, you only have one window existing at that moment, so you only have to take care of that form's dynamic properties. All the other forms that you create after language change will automatically use the new language.
Suppose you want to save the language selection so the next time the application starts, it uses the language selected previously. Save that to permanent storage, such as application settings. If you want, you can use other storages such as system registry, INI/XML/JSON/YAML file, or database. The following example uses the standard application settings to store the language.
private void languageButton_Click(object sender, RoutedEventArgs e)
{
  if (SelectLanguage.Select())
  {
    Properties.Settings.Default.Language = Language.Culture.Name;
    Properties.Settings.Default.Save();
  }
}
The Soluling.Language class contains a static property, Culture, that contains the culture info of the current language. Finally, in your App.xaml.cs file, you read the stored language and set the application's initial language.
public App()
{
  Soluling.Language.SetInitial(LanguageSwitch.Properties.Settings.Default.Language);
}
If you use Windows Forms, read this.
See samples in <data-dir>\Samples\WPF\BiDi to see how to add RTL support.
When XAML was introduced, there were no localization tools supporting XAML. Still, there are very few tools that can properly handle XAML and even fewer that can handle BAML resources of assembly files. This lack of direct support for XAML/BAML caused that programmers did not store string values into XAML but instead added them into a .resx file and used the ResX resource from XAML files. Let's have an example. We have the following XAML file:
<Window
  x:Class="HelloWorld.MainWindow"
  xmlns="http://schemas.microsoft.com/winfx/2006/xaml/presentation"
  xmlns:x="http://schemas.microsoft.com/winfx/2006/xaml"
  Title="Sample" Height="200" Width="400" Loaded="Window_Loaded">

  <StackPanel x:Name="panel">
    <Label x:Name="label1" Content="Hello World" />
    <Label x:Name="label2" />
  </StackPanel>
</Window>
XAML has a Loaded event that updates the content of label2 on run time.
private void Window_Loaded(object sender, RoutedEventArgs e)
{
  label2.Content = "How are you?";
}
How do we localize this? Soluling gives you the easy way. You can keep your XAML files unchanged. The only thing you have to change is to remove the hard code string from C# code. The above code has a "How are you?" string that needs to be resourced. Double click Properties\Resources.resx to open then resource editor. Add the "HowAreYou" name and give it "How are you?" value. Finally, replace the hard-coded string of the event with access to the resource string.
private void Window_Loaded(object sender, RoutedEventArgs e)
{
  label2.Content = Properties.Resources.HowAreYou;
}
This is all you have to do if you use Soluling.
If you use a tool that can not localize XAML/BAML you have to move from the XAML to the resx those string that you want to localize. So first, add another item to Properties\Resources.resx. Add "HelloWorld" name and give it the "Hello World" value. Then you have to make a few changes to the XAML.
<Window
  x:Class="HelloWorld.MainWindow"
  xmlns="http://schemas.microsoft.com/winfx/2006/xaml/presentation"
  xmlns:x="http://schemas.microsoft.com/winfx/2006/xaml"
  xmlns:prop="clr-namespace:HelloWorld.Properties"
  Title="Sample" Height="200" Width="400" Loaded="Window_Loaded">

  <StackPanel x:Name="panel">
    <Label x:Name="label1" Content="{x:Static prop:Resources.HelloWorld}" />
    <Label x:Name="label2" />
  </StackPanel>
</Window>
First, you have to add prop namespace that gives you access to the resource strings. Then you have to change the "Hello World" string with x:Static markup extension. To localize a string in XAML you have to do three changes, start editing two files instead of one, and this will make your XAML much harder to read. No wonder we call this the hard way. It is just too complicated and takes too much of your time. Do not use it!
Unfortunately, all localization tutorials and how-to-do papers from the web recommend that you do not store string values into the XAML file. Instead, they recommend to store the values into a .resx file and use those ResX items from XAML using markup extensions (e.g. {x:Static Resources.String1}). Do not apply. Those documents were written by people that do not know that modern localization tools can easily localize XAML. Tools and services they use can only localize .resx resources. When you use Soluling, you can always store all strings into your XAML file and let Soluling localize the XAML file. Use .resx to store only the strings that are used in your C#/VB code. If you already have used the method described above, you don't have to remove the ResX items from XAML files. You can mix and match the plain string and .resx strings.
<data-dir>\Samples\WPF\HelloWorld directory contains three versions of the same Hello World application:
| Directory | Description |
|---|---|
| Original | Original application that has string in XAML and hard coded string in code. |
| EasyWay | Only hard coded string from code has been resourced into resx file. This is the method you should use. |
| HardWay | In addition to a hardcoded string also string from XAML has been resourced into resx file. This method is too complicated. Do not use this method. |
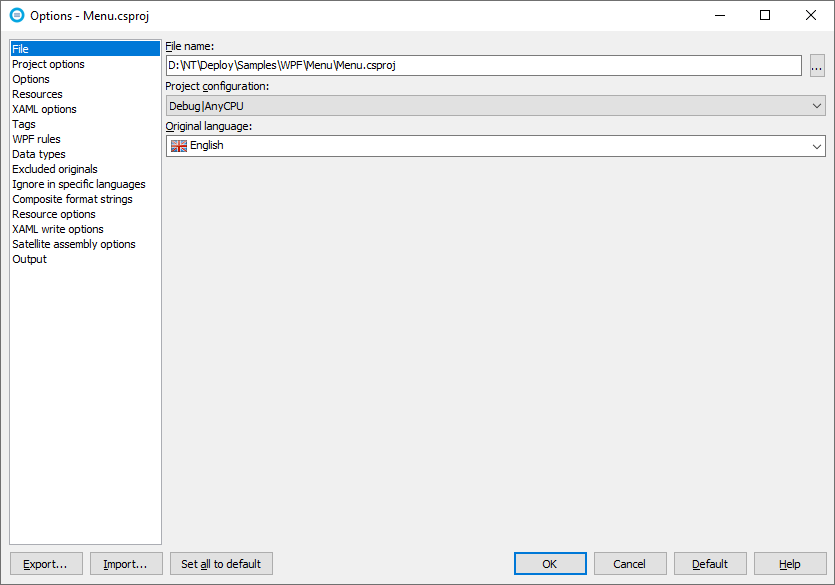
When you perform the build operation, Soluling creates localized .resx and .xaml files. Then Soluling compiles the XML based localized .resx and .xaml files into a binary format: .resources and .baml. Finally, Soluling creates the satellite assembly files. Sometimes the XAML to BAML compilation or satellite assembly creating may fail. The most common reason for that is that Soluling can not locate one or more dependency assemblies of your application, or the assembly file is not up to date. To ensure that your main assembly is up to date, make sure you have compiled your project before building your Soluling project. Also, make sure that your Soluling project uses the same Visual Studio configure as you used when you compiled it. The default configuration is Debug|AnyCPU, but you can change that by right-clicking the .csproj file in Soluling's project tree and choosing Properties.
If this does not help, your Visual Studio project's output directory does not contain all the assemblies. If this is the case, locate the directory where your assemblies are and tell that to Soluling. Enter the assembly directory path to the Assembly directory field.
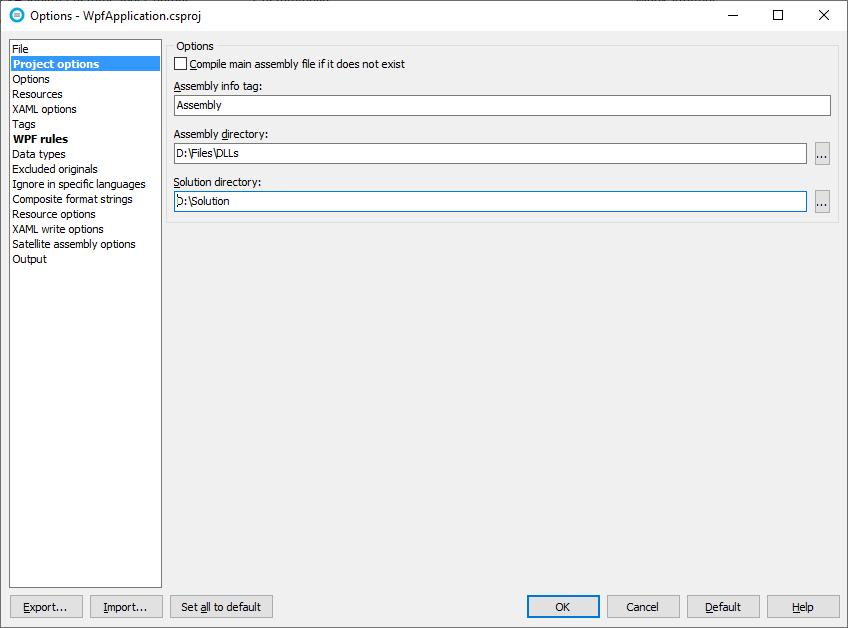
If your .csproj file contains $(SolutionDir) variables, specify the directory of your .sln file in the Solution directory.
You can set the Assembly directory at the solution level if you have added a .sln file to your project.
The order to locate assemblies is:
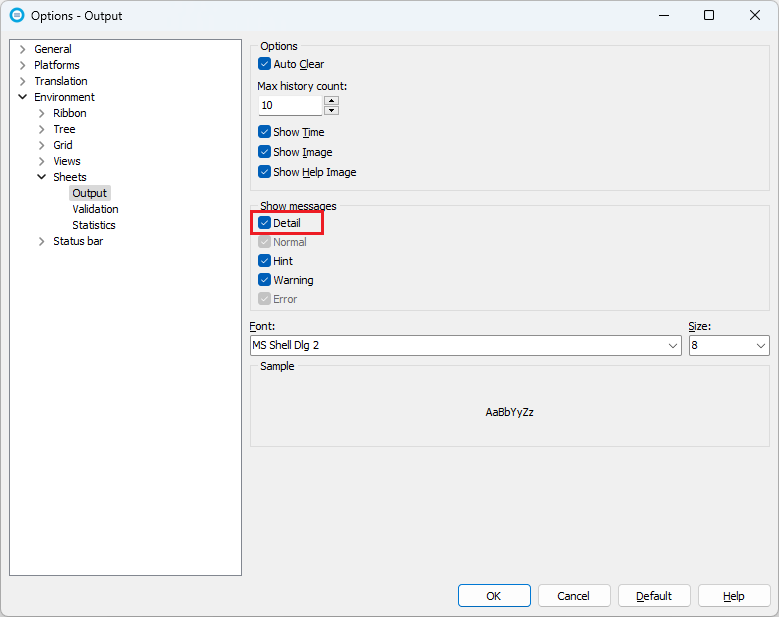
The most common reason for the build errors is Soluling cannot locate the assembly even that exists. In that case turn on the detailed output logging and send us the output. To turn on the detailed log, right mouse click on the Output sheet, choose Customize sheet, and then check Detailed in the dialog that appears. The output log usually contains "Please send "<yourprojectfile>.zip" file to the support team." Get the zip file Soluling created and send it to our support by email (support@soluling.com).
Learn more about different build error causes.
When you deploy a multilingual application, you need to deploy the satellite assembly files. There is one assembly file for each language.
Each satellite assembly must locate on a culture id specific subdirectory of the directory where the main assembly exists. If your main assembly is C:\Files\Application.exe, then German satellite assembly must be in C:\Files\Application\de\Application.resources.dll. If the path or file name is different, .NET runtime does not find the assembly. Soluling always creates satellite assemblies with the right file name and to the right subdirectory. Do not rename or move them to a different directory. You can move them if the relative path to the main assembly remains the same.
Take these output satellite assembly files and deploy them with your other files.
When localizing projects using .NET (.NET Core, .NET 5-10, or later), make sure that the Remove localized resource files after the build process option in enabled. By default it is. This option removes the localized resources, such as MainWindow.de.xaml after the localized satellite assembly has been compiled.
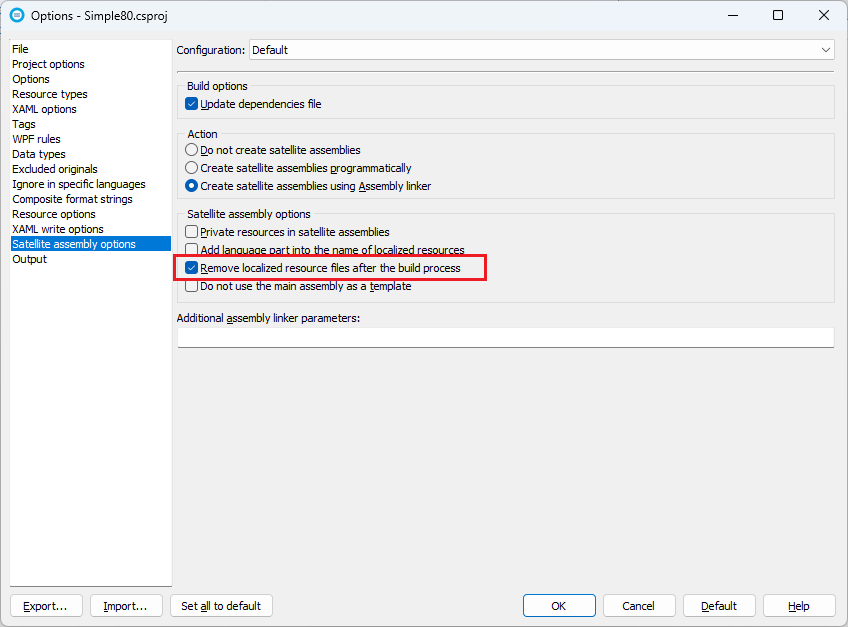
If you want to keep the localized resources, you need to exclude the localized resource file from the project. Otherwise your VS project does not compile.
<Project Sdk="Microsoft.NET.Sdk">
   <PropertyGroup>
       <OutputType>WinExe</OutputType>
       <TargetFramework>net8.0-windows</TargetFramework>
       <Nullable>enable</Nullable>
       <UseWPF>true</UseWPF>
       <PlatformTarget>AnyCPU</PlatformTarget>
   </PropertyGroup>
   <ItemGroup>
       <Page Remove="App.de.xaml" />
       <Page Remove="MainWindow.de.xaml" />
   </ItemGroup>
</Project>
The recommened way is that developer always builds the satellite assemblies in her development machine or on the build server, and then sends the artifact to the translator. If this is the case, you can skip this chapter.
In this option, your translator builds satellites herself and then tests the application. In most cases, she needs more than just the Soluling project files (.ntp) and the application file (.exe). The following list shows the file types you need to send to your translator:
| File type | Description | Visual Studio solution or project file localization |
Assembly file localization method |
|---|---|---|---|
| .ntp | Soluling project files | yes |
yes |
.dll |
All assembly files, including the main assembly |
yes |
yes |
| .sln | Visual Studion solution file | yes |
- |
| .csproj .vbproj |
Visual Studio project file |
yes |
- |
| .resx | Resource file | yes |
- |
| .xaml | UI resource file | yes |
- |
Each file must be relatively in the same location as in the development machine.
Translator needs to have following software:
MsBuild.exe when compiling localized .xaml and .resx files. Soluling uses al.exe when creating satellite assembly files (.dll). Sometimes, the standard MsBuild.exe included to the .NET runtime will work. However, with most projects, you will need a MsBuild from VS.Now a translator can build the satellite assemblies (Home | Build).
To run the application depends highly on your application. Provide instructions to run the application and to choose the active language.
GitHub and <data-dir>\Samples\WPF contains following WPF (.NET) samples:
| Directory | Description | Notes | ||||||
|---|---|---|---|---|---|---|---|---|
| Driving | Shows how to internationalize, localize, and add a runtime language switch for a WPF application.
|
Try this first! | ||||||
| Tutorial | A tutorial sample.
|
Try this first! | ||||||
| BiDi | Shows how to localize to bi-directional languages or from bi-directional languages. Contains the following projects:
|
|||||||
| Core | Shows how to localize a WPF application that uses .NET Core 3, .NET 5 or later. | |||||||
| CustomControl | Shows how to localize a WPF application using custom controls or user controls:
|
|||||||
| Database | Shows how to implement a localized application that uses a multilingual database. | |||||||
| FileDialog | Shows how to localize Filter property of OpenFileDialog and SaveFileDialog dialogs. | |||||||
| Font | Shows how to localize fonts. | |||||||
| HelloWorld | Compares ResX only localization method with XAML/ResX localization method. Contains the following projects:
|
|||||||
| LanguageSwitch | Shows how to perform a runtime language switch. | Runtime language switch | ||||||
| Plural | Show how to use plural messages. Contains the following projects:
|
|||||||
| Sport | Shows how to localize a grid. | |||||||
| SystemString | Shows how to use resource dictionaries to store strings. |
Samples.sln is a Visual Studio 2019/2022 solution file that contains all the above samples. Samples are written in Visual Studio 2019/2022, but the files are compatible with older Visual Studio versions. Each project directory contains a Soluling project file that localizes the project file. All samples work with .NET 3.0 or higher except Database, LanguageSwitch, and Sport requires .NET Framework 4.0 or higher, and Core requires .NET Core 3.1 or higher. Most projects contain two Soluling projects: <projectname>.ntp uses the Visual Studio project localization, <projectname>Bin.ntp uses the assembly file localization.
Project Wizard asks you some options when creating a new project. However, Soluling lets you configure the localization at a very detailed level. Once you have created a project, you can view and modify the configuration of each file of the project. Select a file, right-click, and choose Options.
You can configure how to localize your Visual Studio project file by selecting the item in the project tree, right-clicking, and choosing the Options menu. A source dialog appears that lets you edit the options. This source uses the following option sheets.
You can configure how to localize your Visual Studio solution file by selecting the item in the project tree, right-clicking, and choosing the Options menu. A source dialog appears that lets you edit the options. This source uses the following option sheets.
You can configure how to localize your .NET assembly file by selecting the item in the project tree, right-clicking, and choosing the Options menu. A source dialog appears that lets you edit the options. This source uses the following option sheets.
You can configure how to localize your XAML file by selecting the item in the project tree, right-clicking, and choosing the Options menu. A source dialog appears that lets you edit the options. This source uses the following option sheets.
![]() Copyright © 2016-2026 Soluling Oy
Copyright © 2016-2026 Soluling Oy